How To Cook Rice In Instant Pot
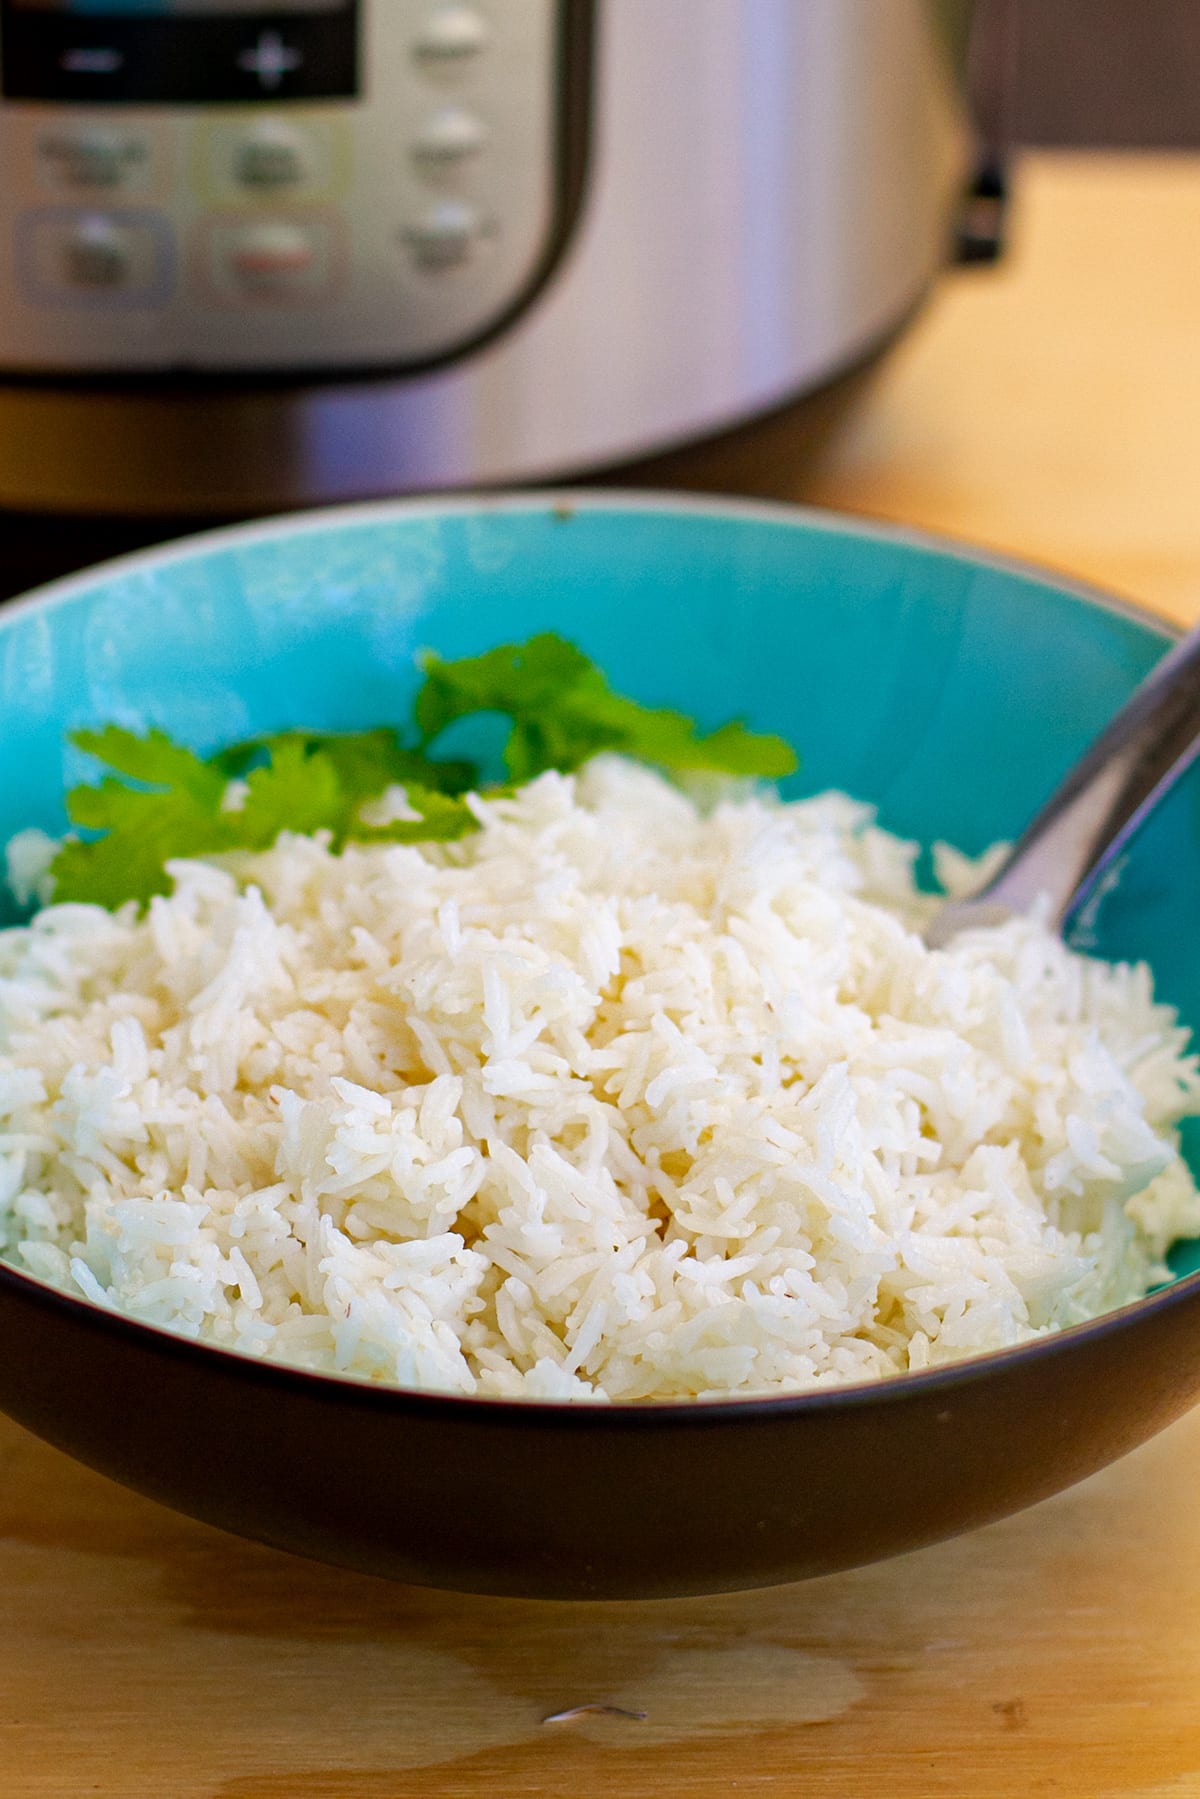
In this beginner-friendly recipe guide, we are going to teach you how to cook rice in the Instant Pot pressure cooker. With detailed instructions, step-by-step photos and cooking tips, you will have perfectly cooked rice every time. We will cover how to make dry white rice such as Basmati, Jasmine and regular long-grain and medium-grain, and provide cooking variations for brown rice, wild rice and Arborio.
Jump to:
- Instant Pot Rice Overview
- Rice To Water Ratio (Instant Pot)
- How To Cook Rice In Instant Pot
- Using The Rice Button
- How To Cook Brown Rice In Instant Pot
- How To Cook Wild Rice In Instant Pot
- How To Cook Arborio Rice In Instant Pot
- Instant Pot Rice Cooking Tips
- Full Recipe
- Instant Pot Rice Recipe
This how-to recipe is part of our Instant Pot for Beginners series. Once you've mastered the basic rice, make sure to try a few variations such as our turmeric jasmine rice, lemon rice, Southwest rice, Indian spinach rice, brisket broth rice, and yellow rice with corn and peas.
Instant Pot Rice Overview
Rice is the most widely consumed staple food on the planet, so naturally, it is one of the first Instant Pot recipes one should learn how to make. Another reason is that the pressure cooker is perfect for making fluffy, well-cooked rice quickly and easily.
In this post we cover how to cook white rice such as long-grain, medium-grain, Basmati or Jasmine. We have provided detailed step-by-step photos to guide you along.
Below, you will also find instructions for cooking brown rice and wild rice, as well as general tips for cooking rice in the Instant Pot.
Rice To Water Ratio (Instant Pot)
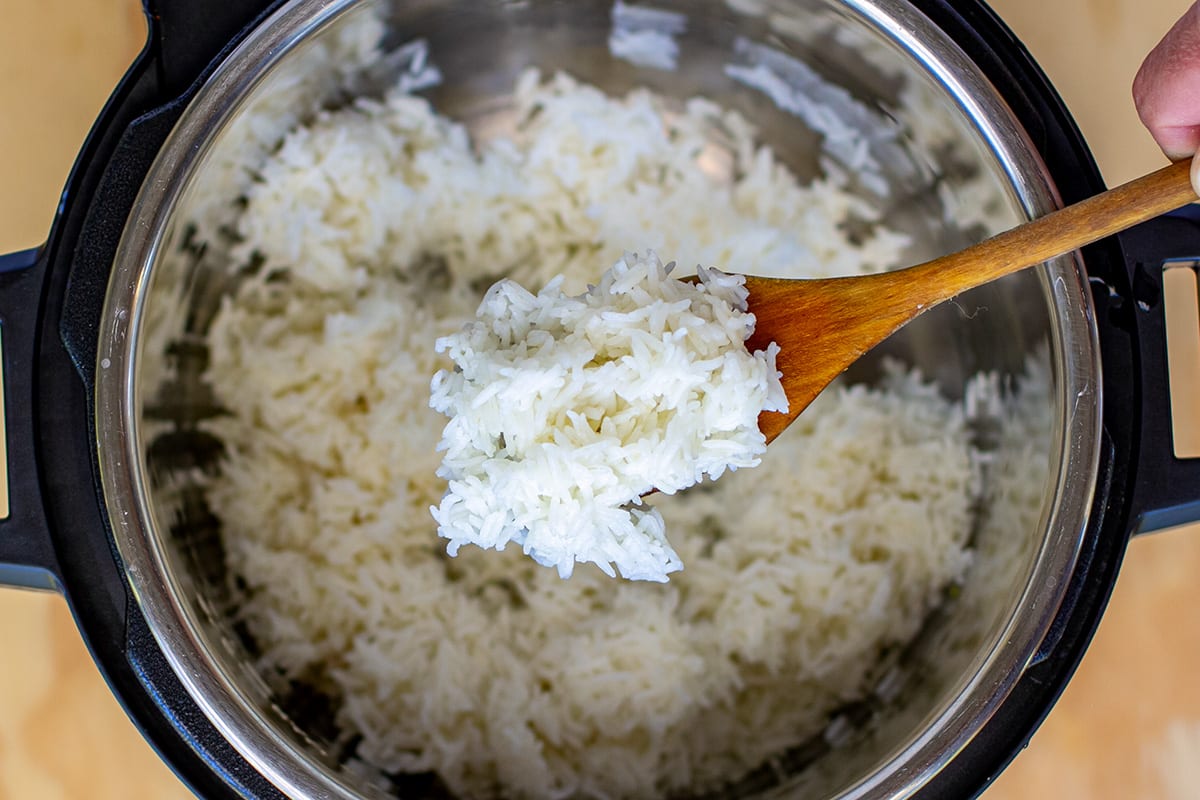
We have made white rice in the Instant Pot MANY time and the perfect water to rice ratio for most types of white rice is the following:
- For 1 cup of white rice use 1.25 cups water. This will give you about 3 cups of cooked rice, perfect for 3 servings.
- For 1.5 cups white rice, use 2 cups water, which will give you about 4.5 cups of cooked rice, great for 4 servings.
For Brown, Wild Rice & Arborio
- Cook 1 cup (6.8 ounces = ~ 193 grams) of Lundberg Wild Rice Blend use 1.5 cups (375 ml) water.
- Cook 1 cup brown rice in 1 cup water or 2 cups of brown rice in 2.25 cups of water.
- Cook 1 cup of Arborio in 3 cups of liquid for a porridge-like consistency.
How To Cook Rice In Instant Pot
Here are step-by-step instructions for making medium-grain and long-grain white rice such as Basmati or Jasmine rice in the Instant Pot. We used Instant Pot Duo Nova 6-quart pressure cooker for this recipe.
Prepare The Rice
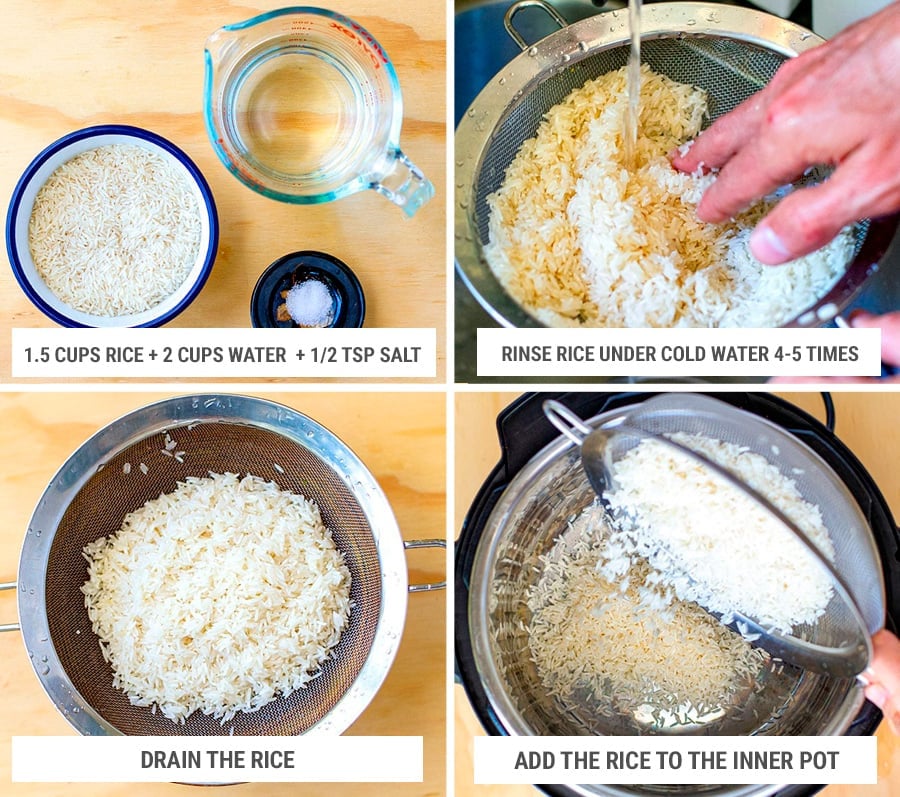
Wash the rice under cold water 4-5 times to remove excess starch. This will result in fluffier, most separated cooked rice. Use your hand to rub the rice underwater. Strain and add rinsed rice to the inner pot.
Add The Liquid
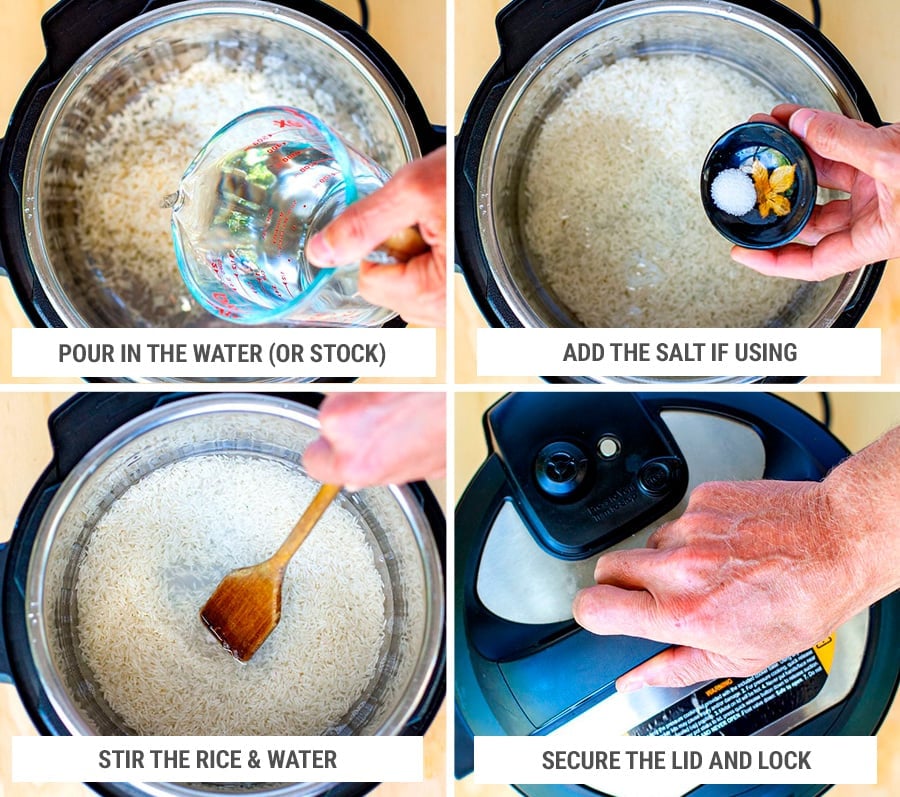
Add water (or stock) and salt (if using) and stir. Pop the lid on top, secure and lock in place.
Pressure Cook The Rice With Manual Setting
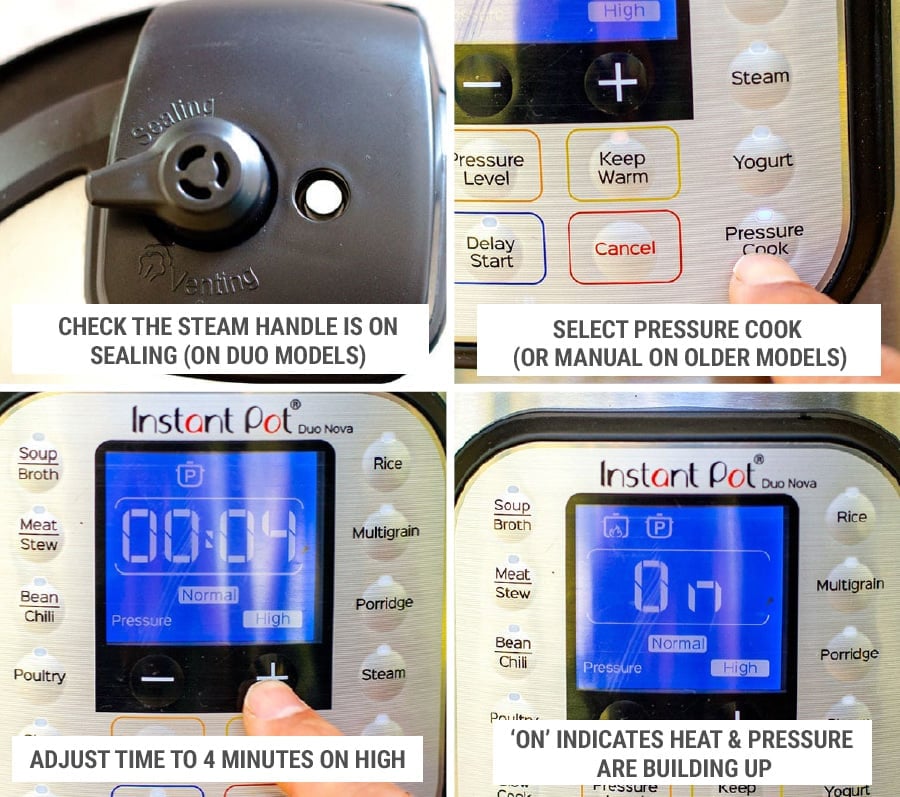
If using classic Instant Pot Duo, check that the steam release handle is pointing to Sealing.
Select Pressure Cook button (or Manual on older models). Make sure the pressure level is set to HIGH and use - and + buttons to adjust the time to 4 minutes. If you need to change from LOW to HIGH, press Pressure Level to toggle between settings. You can leave the Keep Warm default setting on.
After 3 beeps, the display will show ON and two status icons at the top indicating that the pot is heating up and the pressure is building. This will take about 5 minutes.
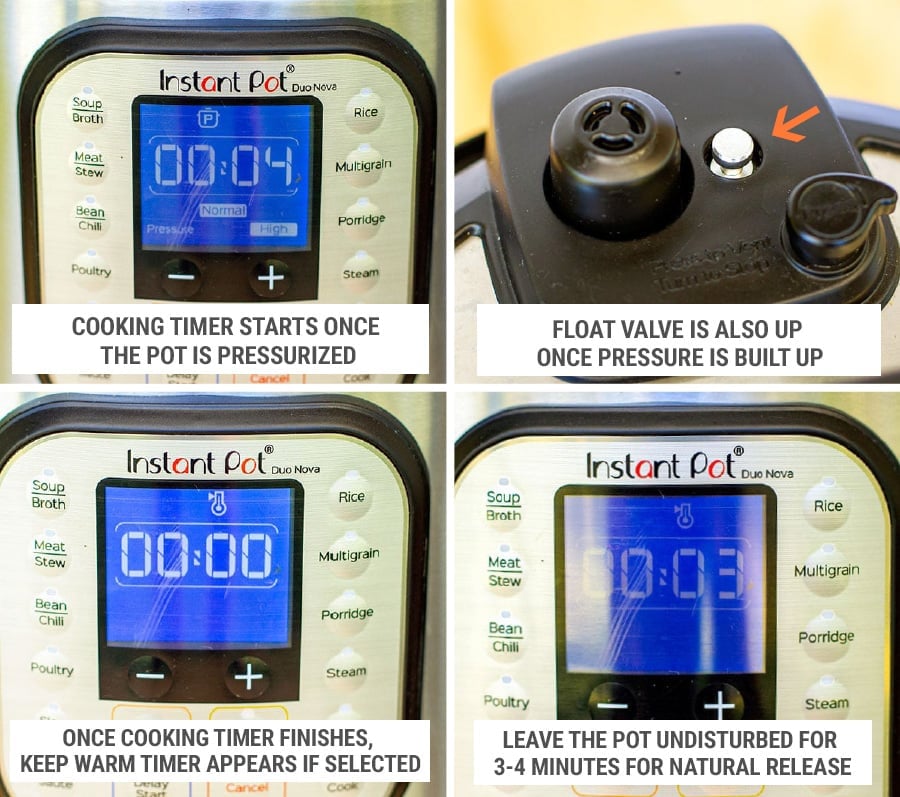
Once pressure is built up, the cooking timer of 4 minutes will display. The lid's float valve will also rise as the pressure is built up. Once the cooking timer is done, the Keep Warm cycle will begin with a new 00:00 timer.
During this stage, the Instant Pot will start to depressurize and cool down. Leave it undisturbed for 2-3 minutes to release some of the pressure naturally (but not longer than that as the rice will keep cooking!).
Release The Pressure
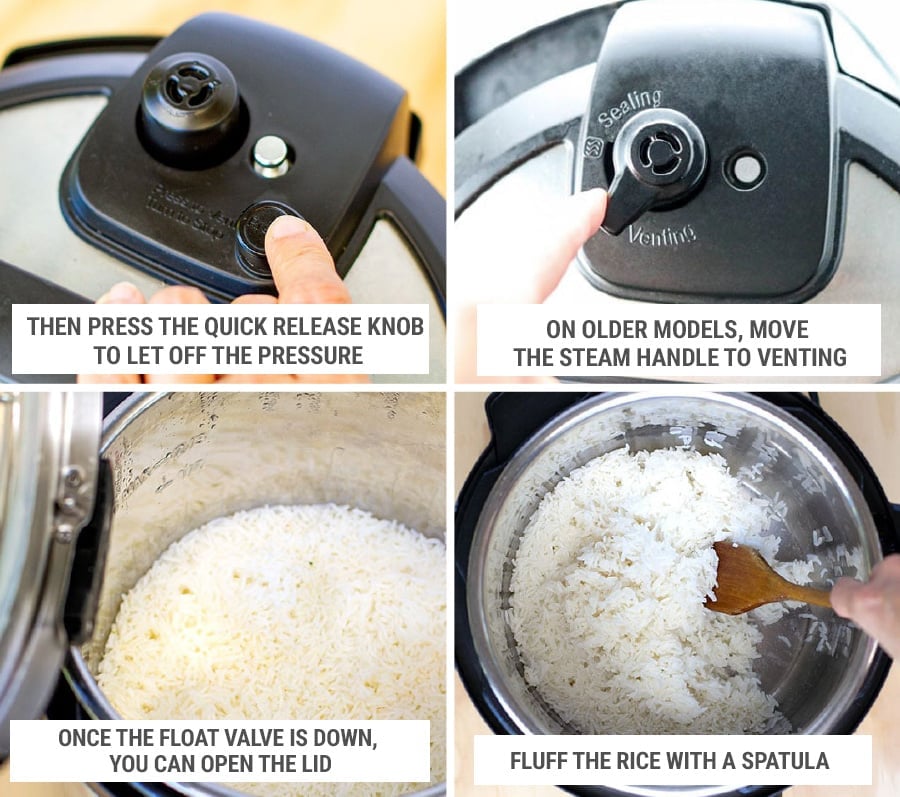
Then perform a quick release to let off the remaining pressure and steam. Simply press the Quick Release knob button on the lid to let the steam and pressure escape from the steam release valve. On older models, point the handle to Venting.
Once the pressure is completely released, the float valve will go back down and you will be able to open the lid. Fluff the rice with a spatula or a spoon and serve while hot. Press Cancel to stop the Keep Warm cycle at this stage unless you want to keep the rice for a little longer. Please note, that the rice will continue to very slowly cook this way and may get a little stuck to the bottom.
Using The Rice Button
You can choose to select the RICE smart program button. This program cooks on low pressure and is best used for white rice.
For rice with a firmer texture or thinner rice like Jasmine or Basmati, use the Less mode; for rice with a normal texture or regular long-grain or medium-grain white rice, use the Normal mode; if you like really soft rice, use the More mode. You can change the modes by pressing the RICE button again.
Use quick release at the end, no need to leave the Instant Pot on natural release.
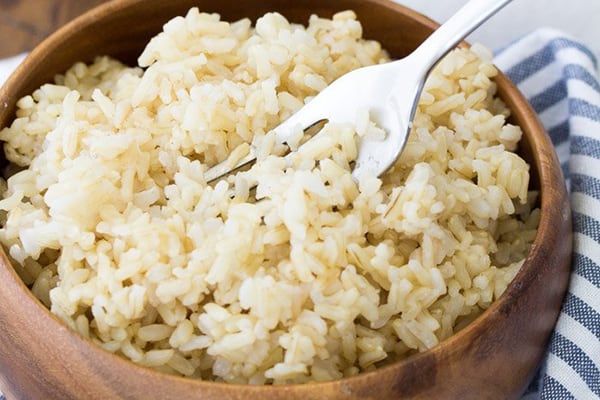
How To Cook Brown Rice In Instant Pot
Unlike white rice, brown rice has its grain husk intact, which takes longer to cook. Using the Instant Pot to cook brown rice is much quicker compared to stovetop.
- Rinse 1 cup of brown rice once under cold water (this rice doesn't have as much starch as white rice).
- Add brown rice to the pot together with 1 cup water and ½ teaspoon of salt or the same amount of stock without salt. If cooking 2 cups of rice, add 2.25 cups of water and or stock.
- Set to Manual/Pressure Cook for 20 minutes on HIGH with 10 minutes of natural pressure release (NPR), and then use the quick release. Total time is about 35 minutes.
- If you prefer slightly softer brown rice, set the timer to 22 minutes.
How To Cook Wild Rice In Instant Pot
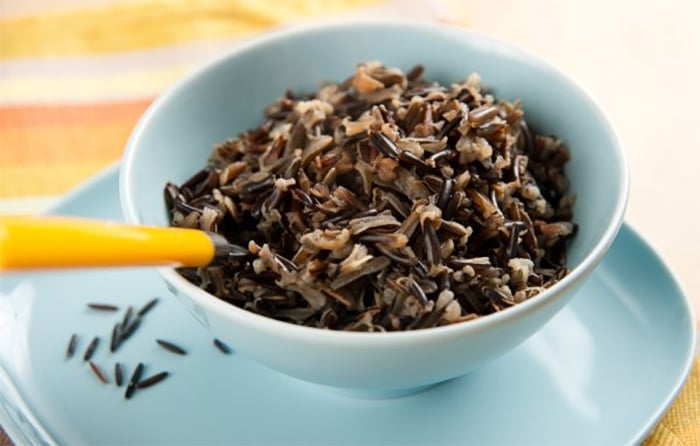
- The ratio of wild rice blend to liquid is 1 to 1.5 cups. Rinse the rice briefly and drain.
- Cook 1 cup (6.8 ounces = ~ 193 grams) of Lundberg Wild Rice Blend in 1.5 cups (375 ml) of water or stock for 25 minutes at HIGH pressure with natural release all the way. Total time is about 45 minutes.
- Check out all the delicious recipes you can make with wild rice here.
How To Cook Arborio Rice In Instant Pot
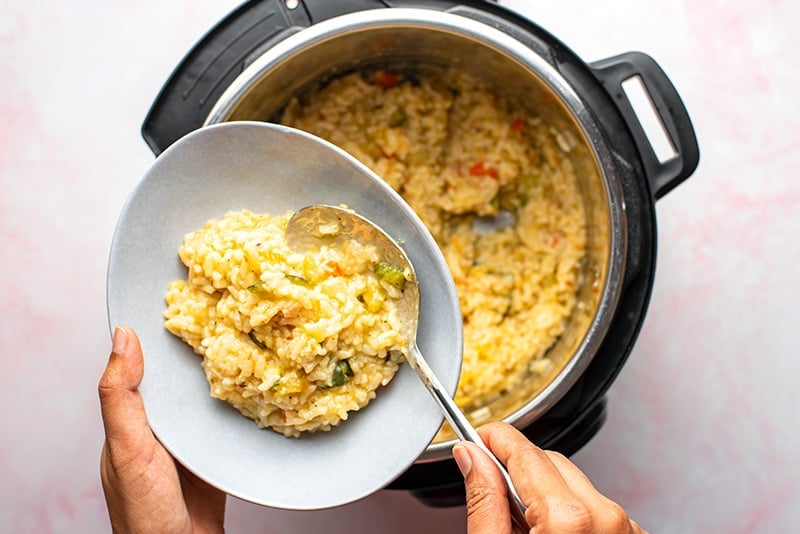
Cooking Arborio rice in an Instant Pot is slightly different from cooking regular long-grain rice due to its unique characteristics. Arborio rice is commonly used for risotto, which has more starch and results in a creamier texture. Arborio rice is left unrinsed and requires more liquid, so you end up with porridge consistency.
- Chop a small onion and mince 2-3 cloves of garlic. Begin by setting the Instant Pot to "Sauté" mode and melt 2 tablespoons of butter or olive oil. Add the onion and garlic, sautéing until the onion turns translucent.
- Add 1 cup of Arborio rice (not rinsed!), toasting it lightly. For added depth, add ½ cup of dry white wine and let it simmer briefly. Add 3 cups of chicken or vegetable stock and stir the rice, season with extra salt and pepper or you can do this to taste after cooking. . Set to "Manual" or "Pressure Cook" mode on high pressure for 5 minutes, followed by a natural pressure release lasting 5-10 minutes.
- Open the lid, add grated Parmesan and extra butter and stir through for extra creaminess and flavor.
Instant Pot Rice Cooking Tips
- Rinse white rice: Always rinse white rice a few times under cold water before cooking. This helps remove excess starch and prevents the rice from becoming too sticky. Brown rice and wild rice only need a quick rinse. Don't rinse Arborio rice.
- Use the Right Ratio: Generally, the ratio of rice to water is 1:1 for white rice, however, we find that 1: 1.25 works slightly better. For brown rice, it's about the same really.
- To NPR or not to NPR: some white rice recipes recommend that you naturally release the pressure, however, we find that the longer you leave the pot on natural release after the cooking timer is done, the softer the rice gets as it continues to cook in the residual heat. For white rice, you can leave the pot on NPR for up to 3 minutes but after that the rice starts to get softer, so it's best to quick release the pressure soon after cooking. For brown rice, natural release is totally fine as this type of rice doesn't cook as quickly and more likely to keep its shape.
- Beware of Keep Warm Setting: While it's great to leave it on to keep the rice warm while you're preparing the rest of the dinner, it can dry out the cooked rice and make it stick to the bottom of the pot. Just something to keep in mind!
- Rice Button Option: You can also choose to select the RICE smart program button. This program cooks on low pressure and is best used for white rice. For rice with a firmer texture or thinner rice like Jasmine or Basmati, use the Less mode; for rice with a normal texture or regular long-grain or medium-grain white rice, use the Normal mode; for rice with a softer texture, use the More mode. You can change modes by pressing the Rice button again. Use quick release at the end.
- Add More Flavor/Color: Use chicken or vegetable stock instead of water for extra flavorful rice. You can also stir in half water/stock and half coconut milk for an Asian twist. Adding ½ teaspoon of turmeric will give you beautiful yellow rice.
- Storage tips: Cool and refrigerate leftover rice as quickly as possible. Store leftover cooked rice in an airtight container in the fridge for no longer than 24 hours before reheating it – and then only reheat it once.
- Can You Freeze Cooked Rice? Yes, you can safely freeze any leftover cooked rice to eat at another time. Make sure to cool as quickly as possible after cooking (spreading it on a flat tray or plate will help). Then store in Ziploc bags with a date on for up to 2 months. Defrost in a microwave on high heat, see how here.
- Using Leftover Rice: Cold rice is perfect for turning into flavored, hot-fried rice or throwing it into soups or stews. You can also use leftover rice to make fritters, fishcakes, and vegetarian patties with beans or lentils.
Full Recipe
Find the full list of ingredients, instructions, and a nutritional breakdown below. If you have questions or cook this recipe, please let us know in the comments, and make sure to rate this recipe so it’s easy for others to find.


