Every video or audio clip, either in a bin or on a sequence, has an Start Time and an End Time. When a clip is placed on a sequence, only frames or samples from the region between the Start and End Time are used. Frames or samples before the Start Time and after the End Time are trimmed.
By default, a clip's Start Time is at the start of the clip, and the End Time is at the end. i.e., Nothing is trimmed.
In the Clip Preview
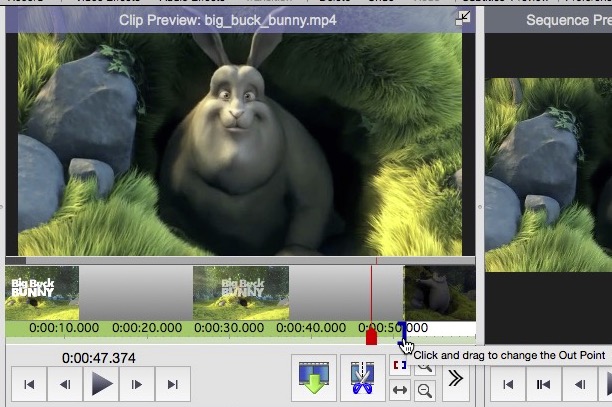
Select a video or audio clip in a bin or on a sequence to show it in the clip preview. On the clip preview's timeline, the Start Time shows as a red triangle, and the End Time shows as a blue triangle. Drag either triangle to move the In or End Time. Alternatively, move the clip preview's current playback position and select Clip -> Player -> Set Clip Start Time or Set Clip End Time, or click the red or blue flag icon button. If the clip you are changing is on the sequence and the new In or End Time you have chosen will conflict with another clip on the sequence, then the clips are moved to the right so that no clips will overlap. Hold Alt while changing the In or End Time to temporarily disable this behavior.

Click the Split button in the Clip Preview and it will save a duplicate video clip into the Bin with your edited Start and End Time. Select the saved video clip from the bin and re-position the playback position on the timeline anywhere in between the Start and End Time. You can use the Split button again to save another duplicate video clip with different Start and End Time.
Trimming Clips in Sequence and Sequence Preview
On a Sequence
Click on the timeline to a position where a selected clip is. Control-click on a selected clip and click Split Selected Clip(s)
On a Sequence (Timeline Mode only)
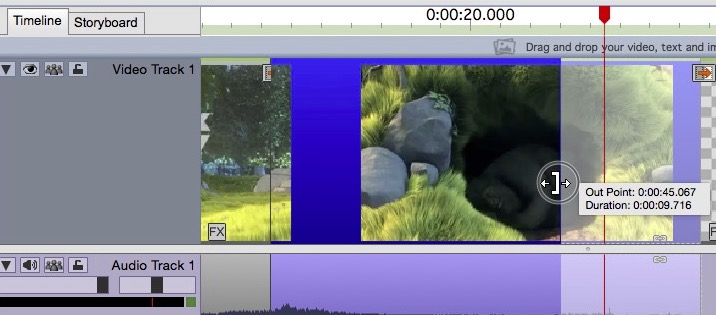
Hover the mouse cursor over the left edge of a clip and the cursor will change to resizing cursor. Click and drag to move the left edge of the clip and change the clip's Start Time. Likewise, dragging the right edge of a clip changes its End Time. Note that the Start Time cannot be dragged earlier than the beginning of the clip, and the End Time cannot be dragged later than the end of the clip. If you resize a clip so that it overlaps with another clip then some clips will be moved to the right on the sequence to compensate so that no clips will overlap. Hold Alt while resizing to temporarily disable this behavior.

On a Sequence (Storyboard Mode only)
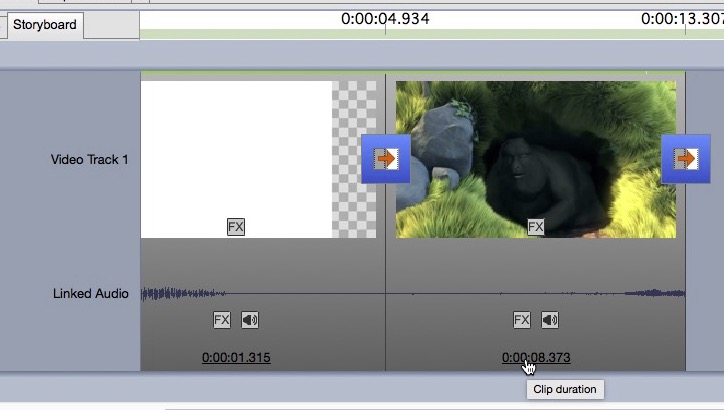
The Start Time of a clip can't be modified here, however changing the duration (by clicking on the duration at the bottom of the clip) will move the End Time.

Splitting Clips in Sequence and Sequence Preview
Any type of clip on a sequence can be cut in two by splitting it. Splitting can be used to remove part of a clip from a sequence (e.g., removing advertisements), to move part of a clip (e.g., to make space for a cut-away shot), to allow a transition to be used, or many other reasons.
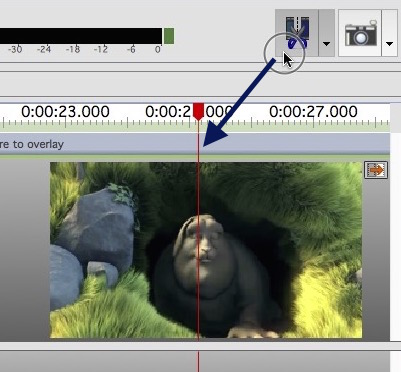
To split one or more clips, move the current playback position on the sequence or sequence preview to the split position and do one of the following:

The methods of splitting are:
Split Selected Clip(s)
All selected clips, including any linked or grouped clips, on any video or audio track, will be split.
Split All Tracks
All clips, selected or not, on any video or audio track, will be split.
Split All Video Tracks
All clips, selected or not, on any video track, will be split.
Split All Audio Tracks
All clips, selected or not, on any audio track, will be split.